
A while back, I wrote an article about how to make your own fly drying patch out of simple materials. It’s easy and a fun project for winter. But I failed to mention that you can use the same technique for making your own fly boxes and they’re even easier. Plus, they give you a little more leeway to be creative. Here’s how …
What you’ll need
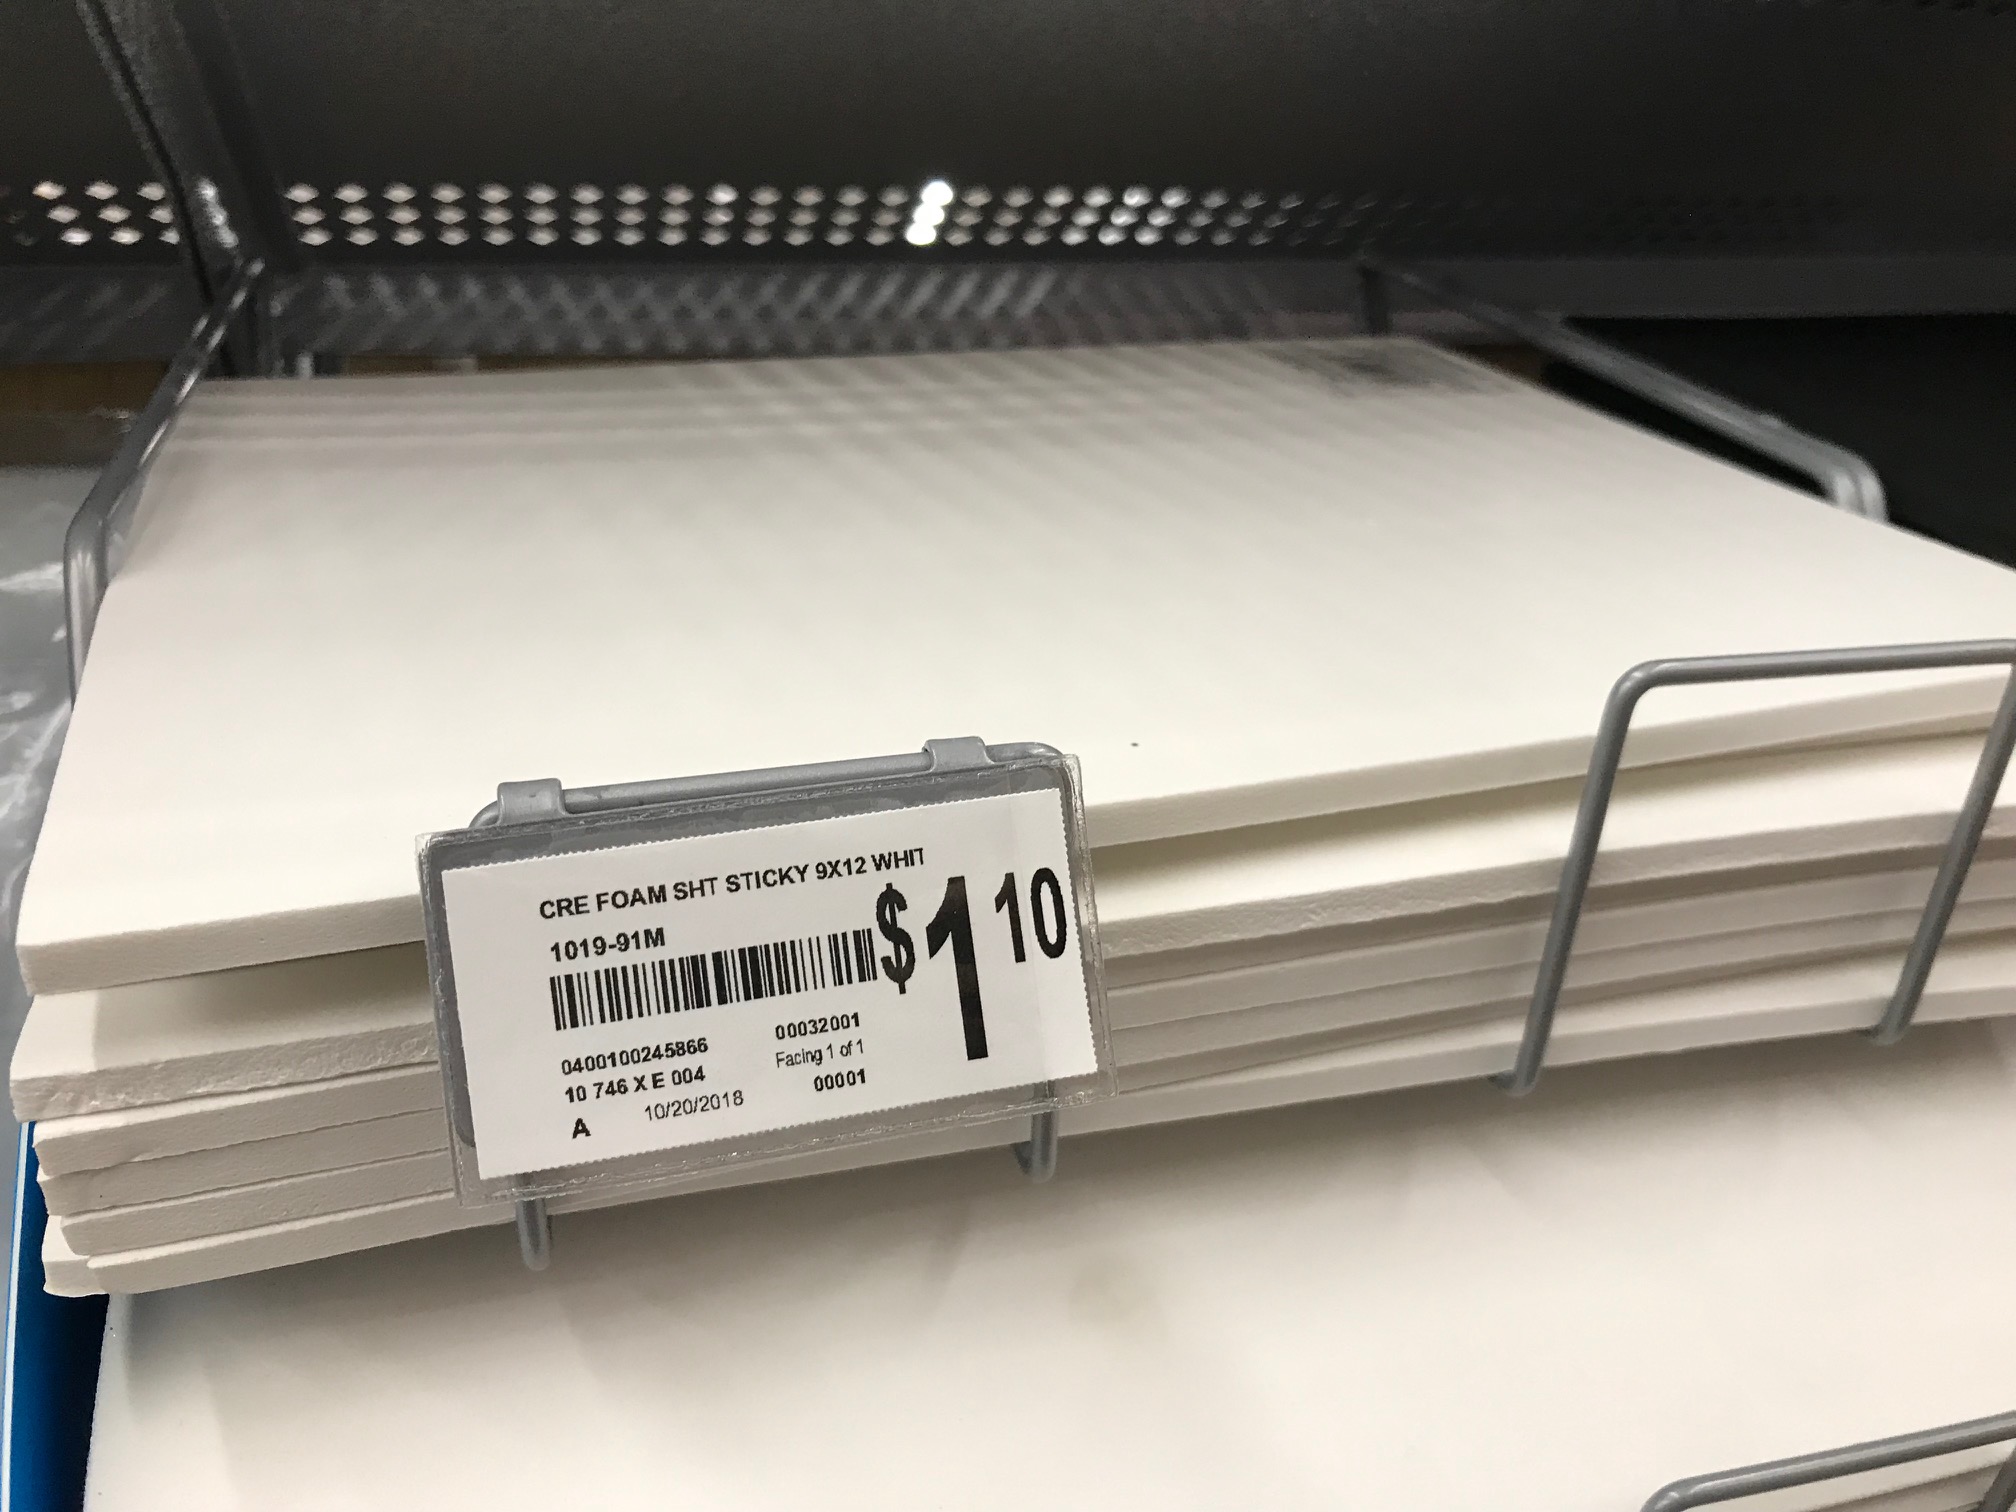
1. Foam. This is a slotted-foam style box so you’ll need to pick up some craft foam from a store like Michaels. Make sure you get the 1/4″ and not the 1/8″ foam that is popular for fly tying (it’s too thin). It comes in a variety of colors so you can have a little fun with it and make your boxes unique.
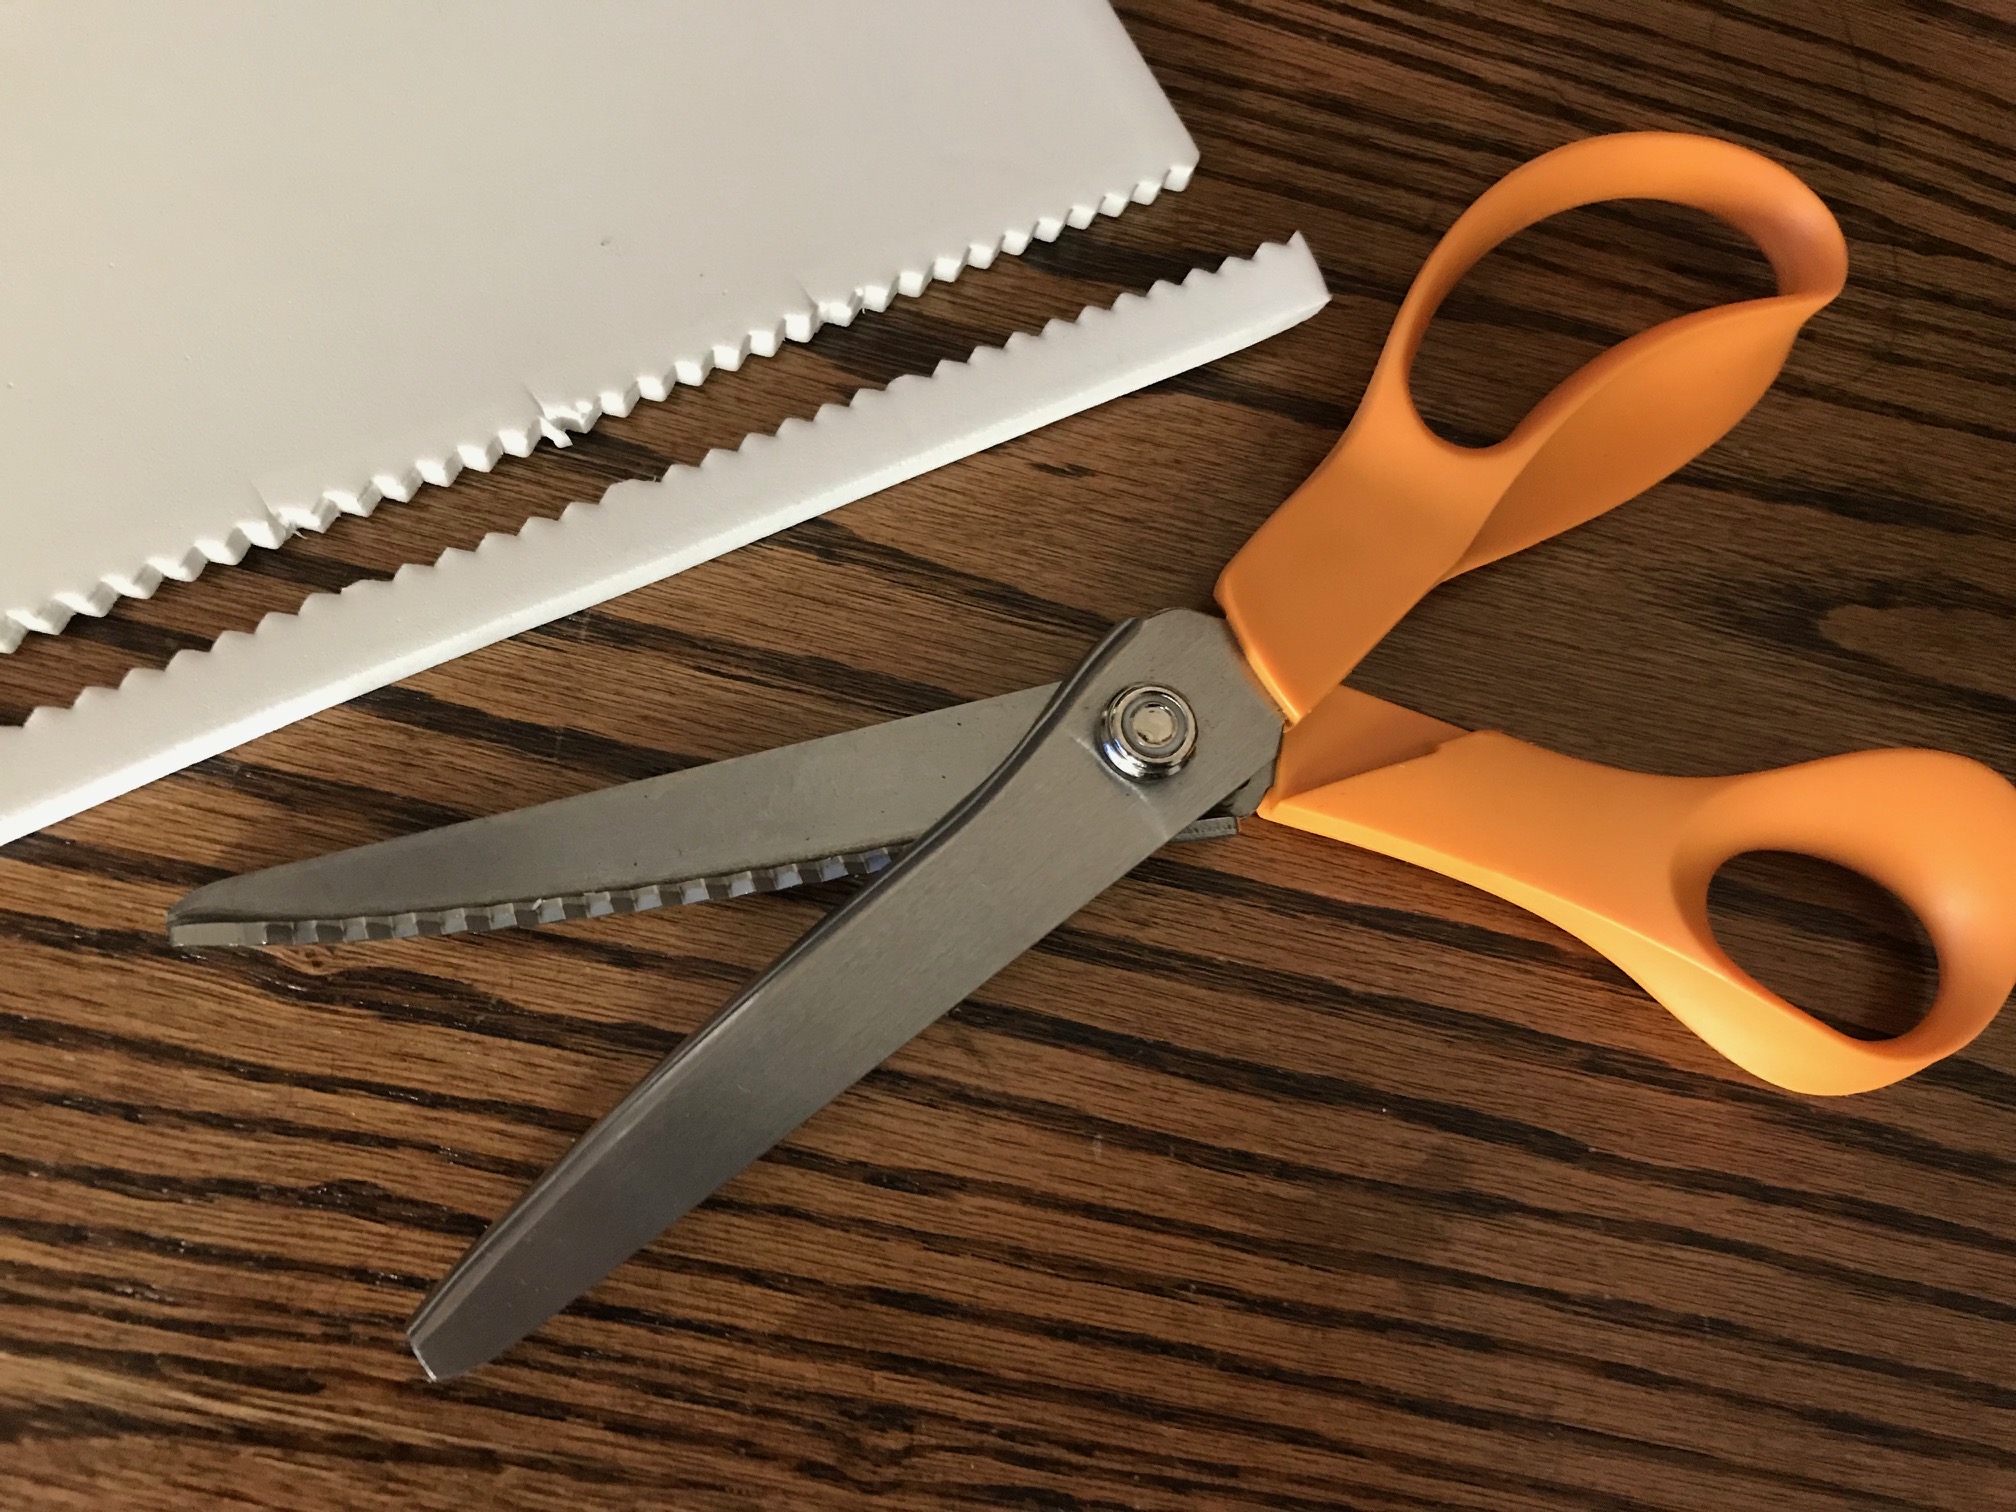
2. Pinking shears. These are special scissors used to cut fabric and will form the valleys for the bars of foam you’ll cut.
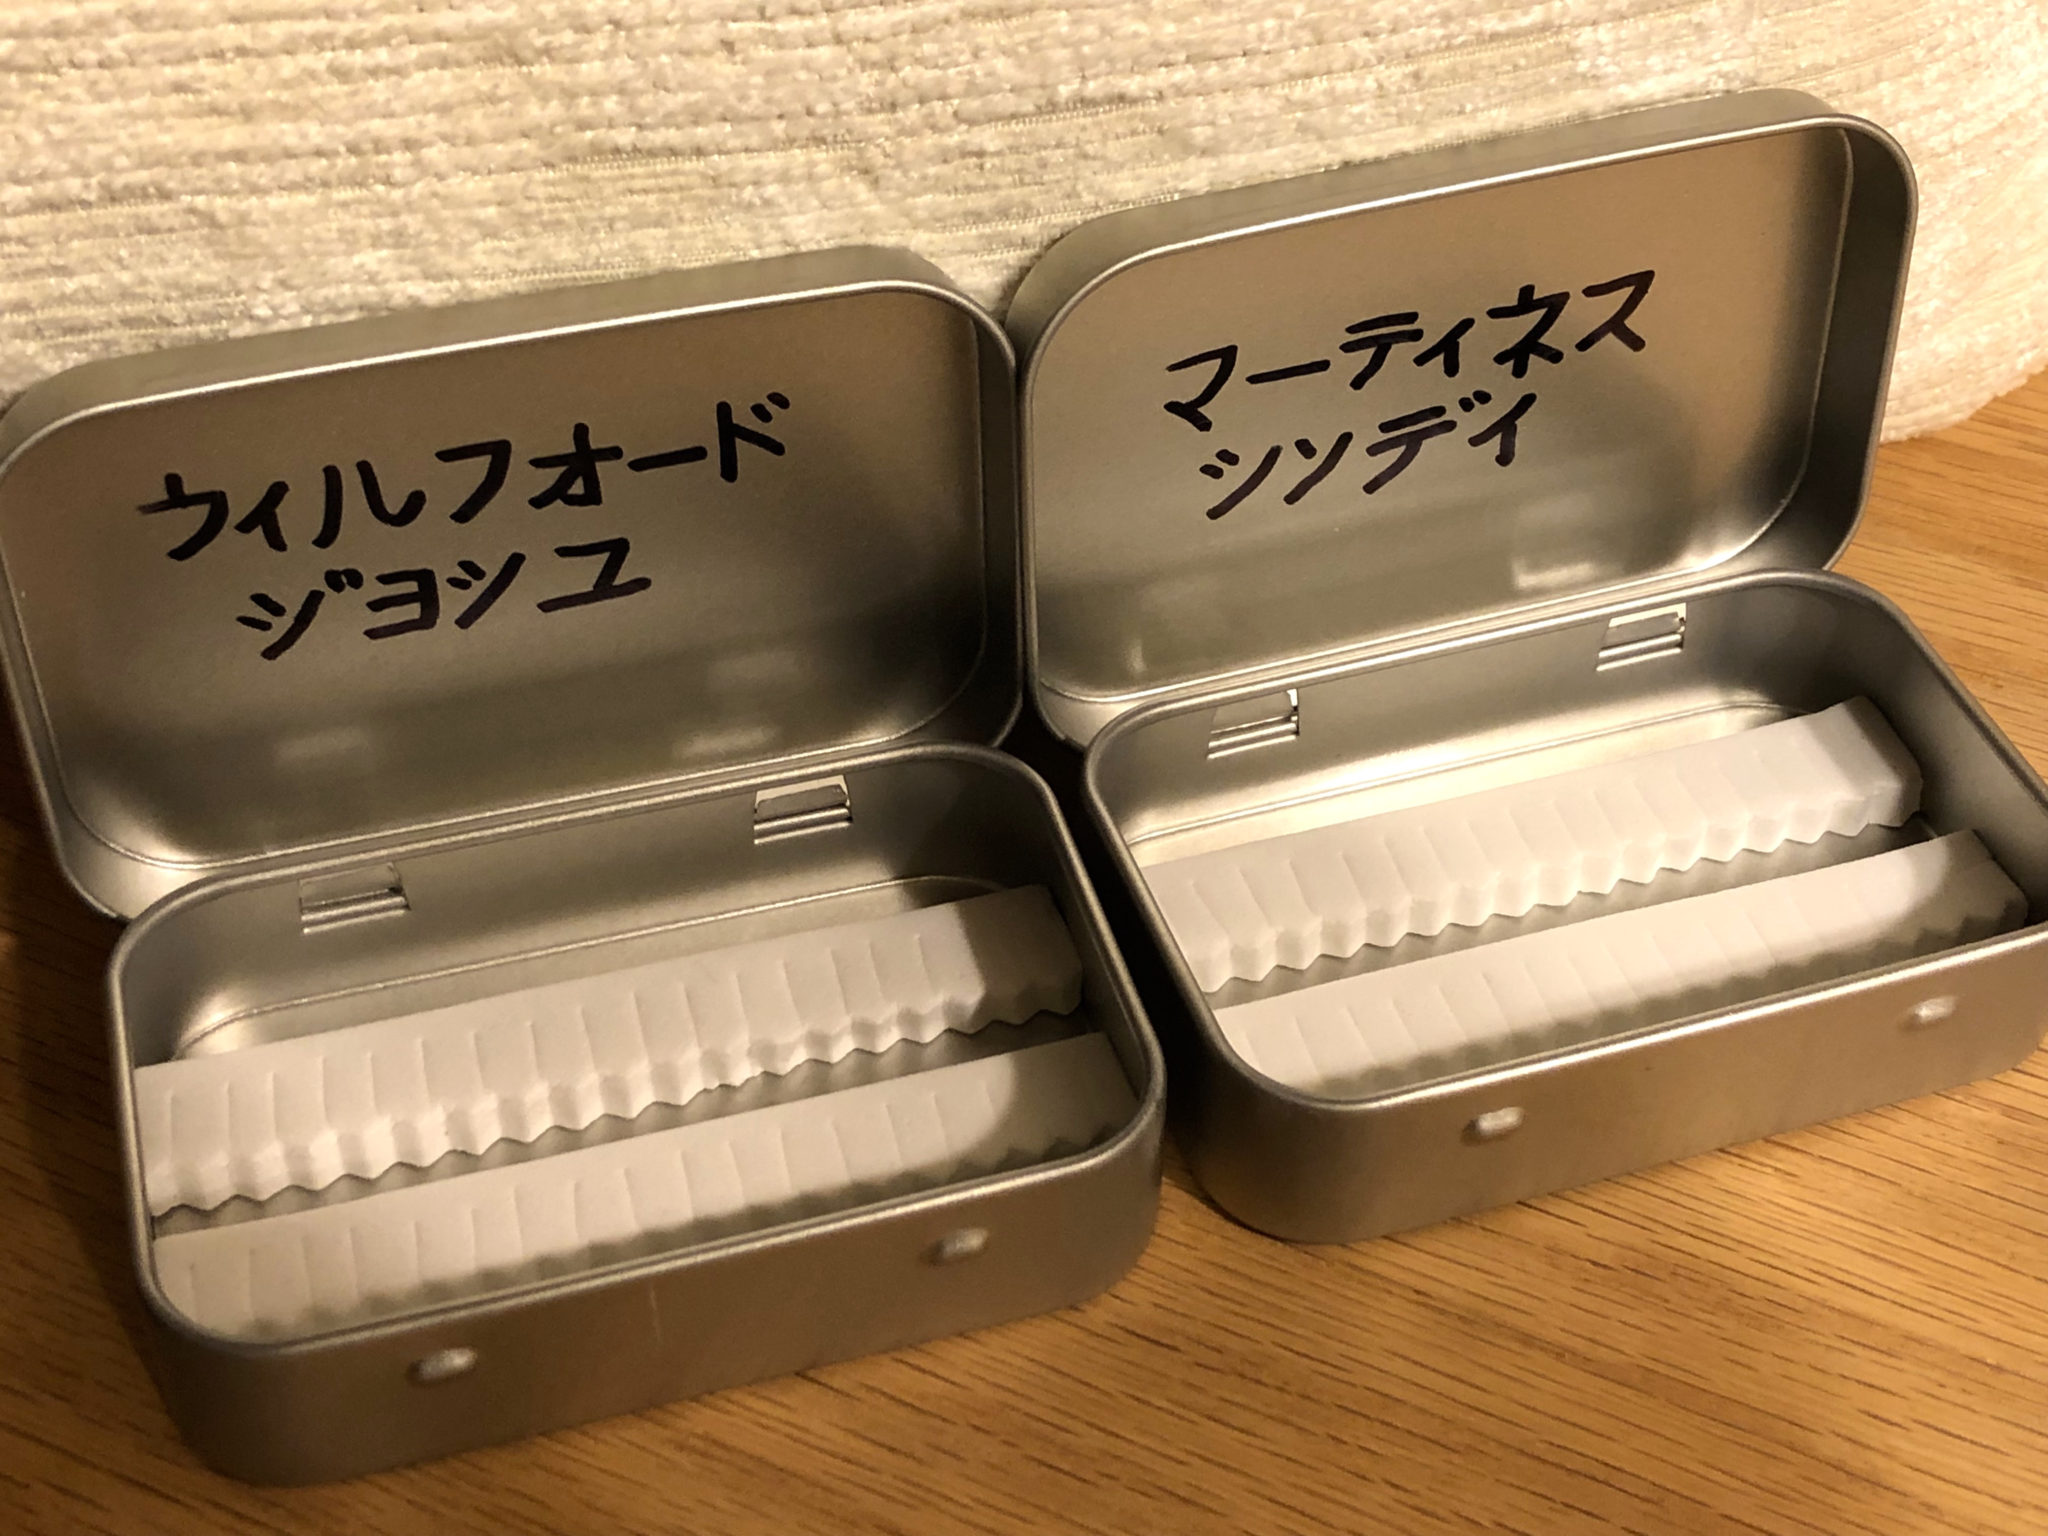
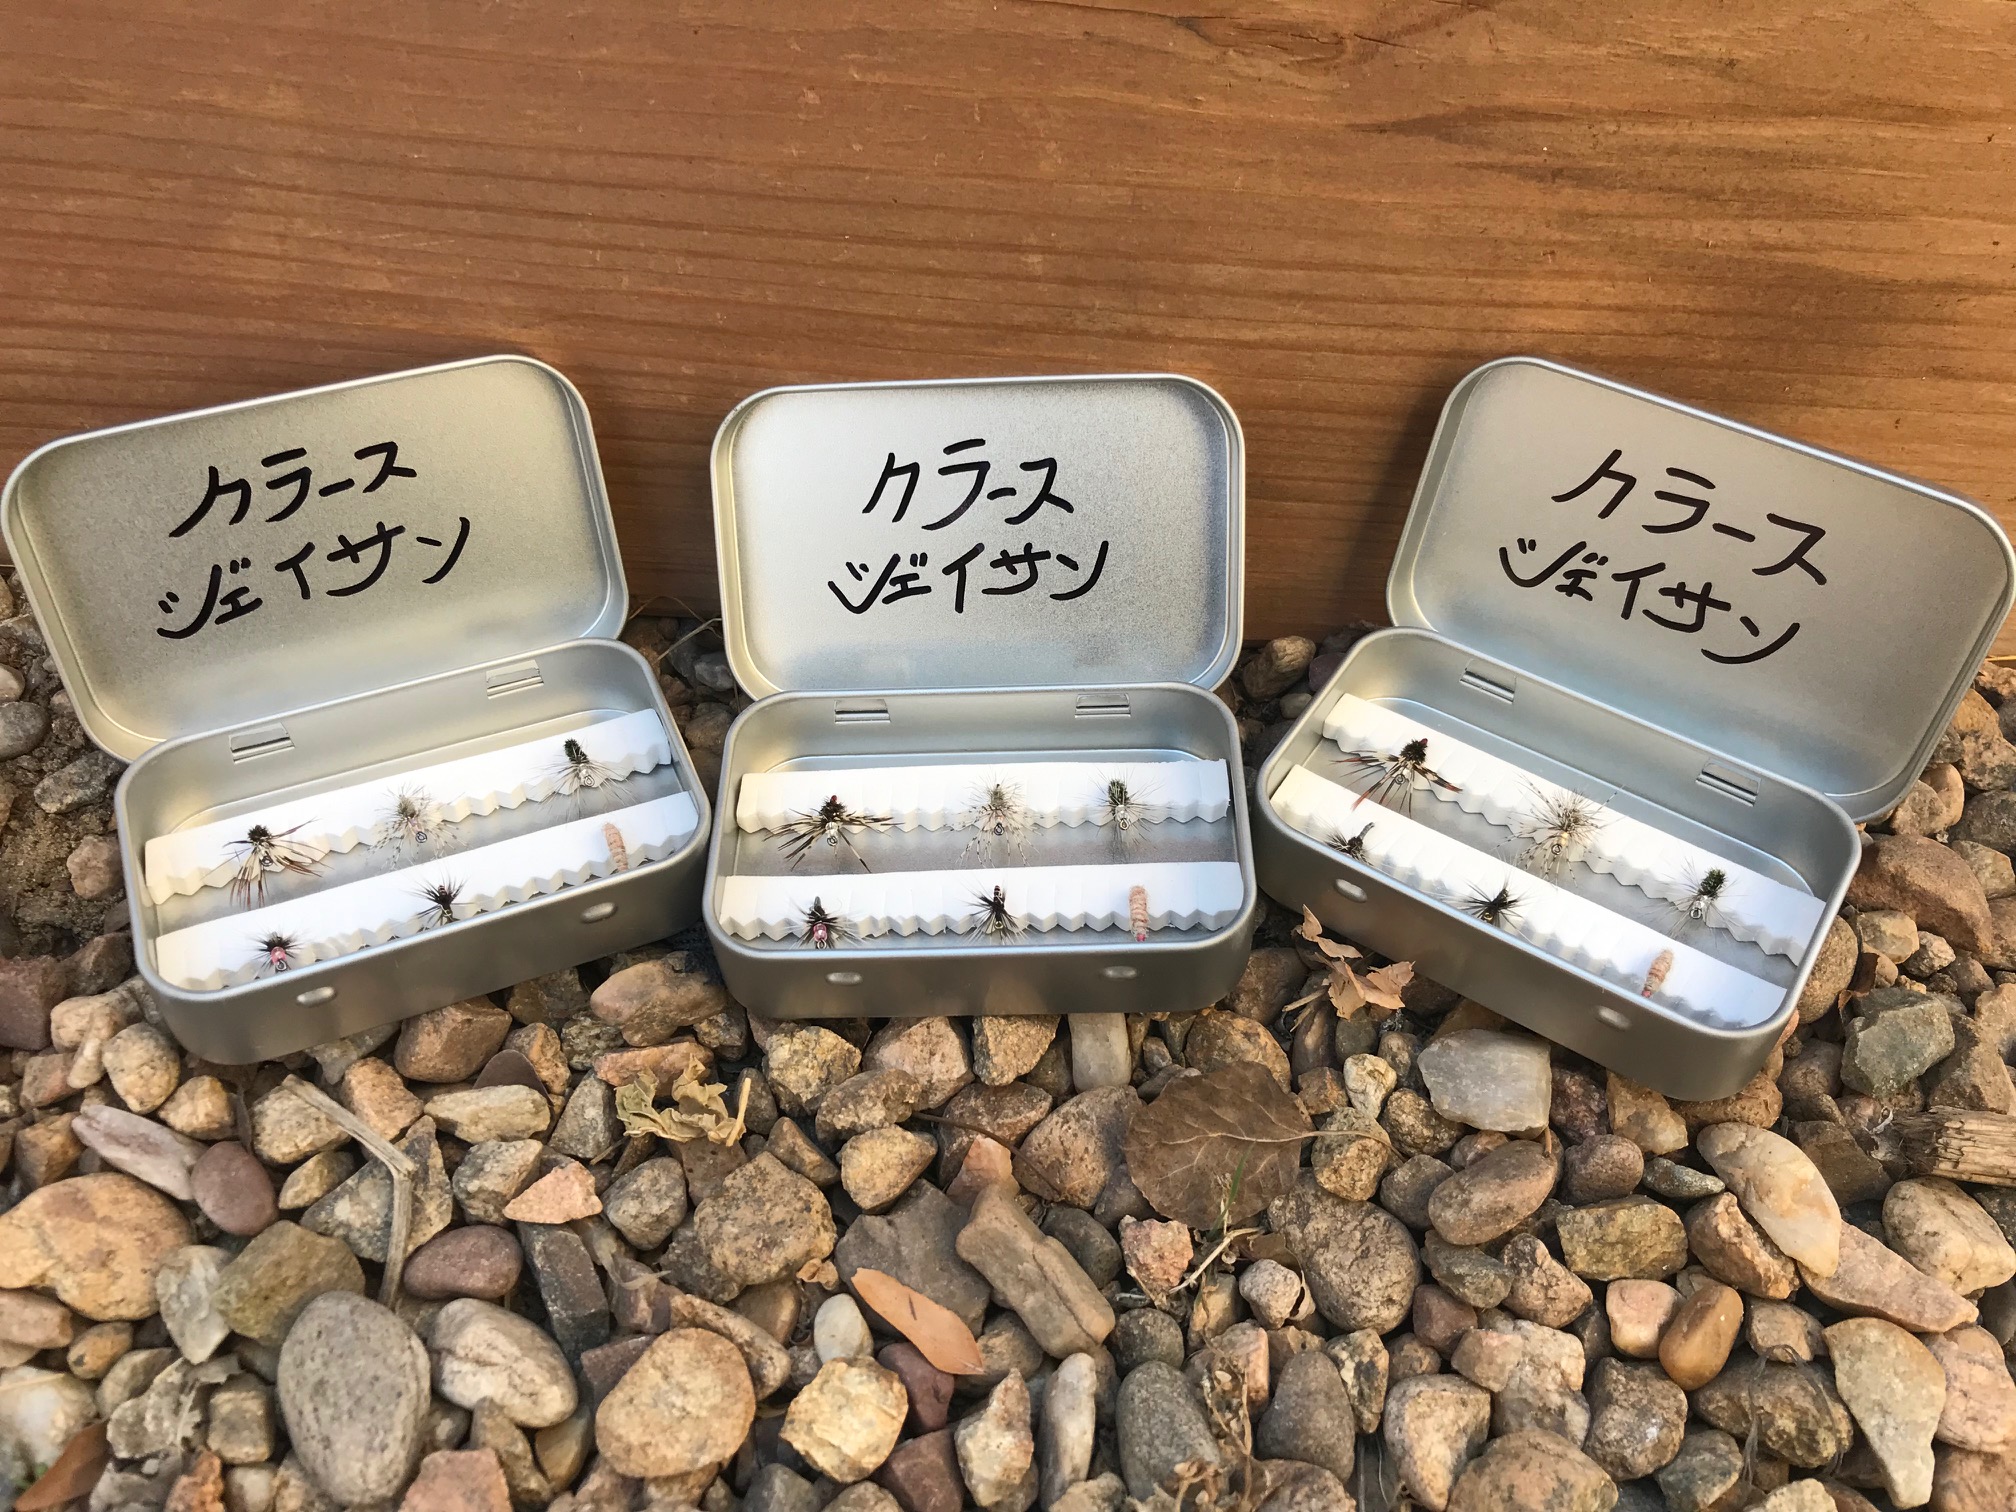
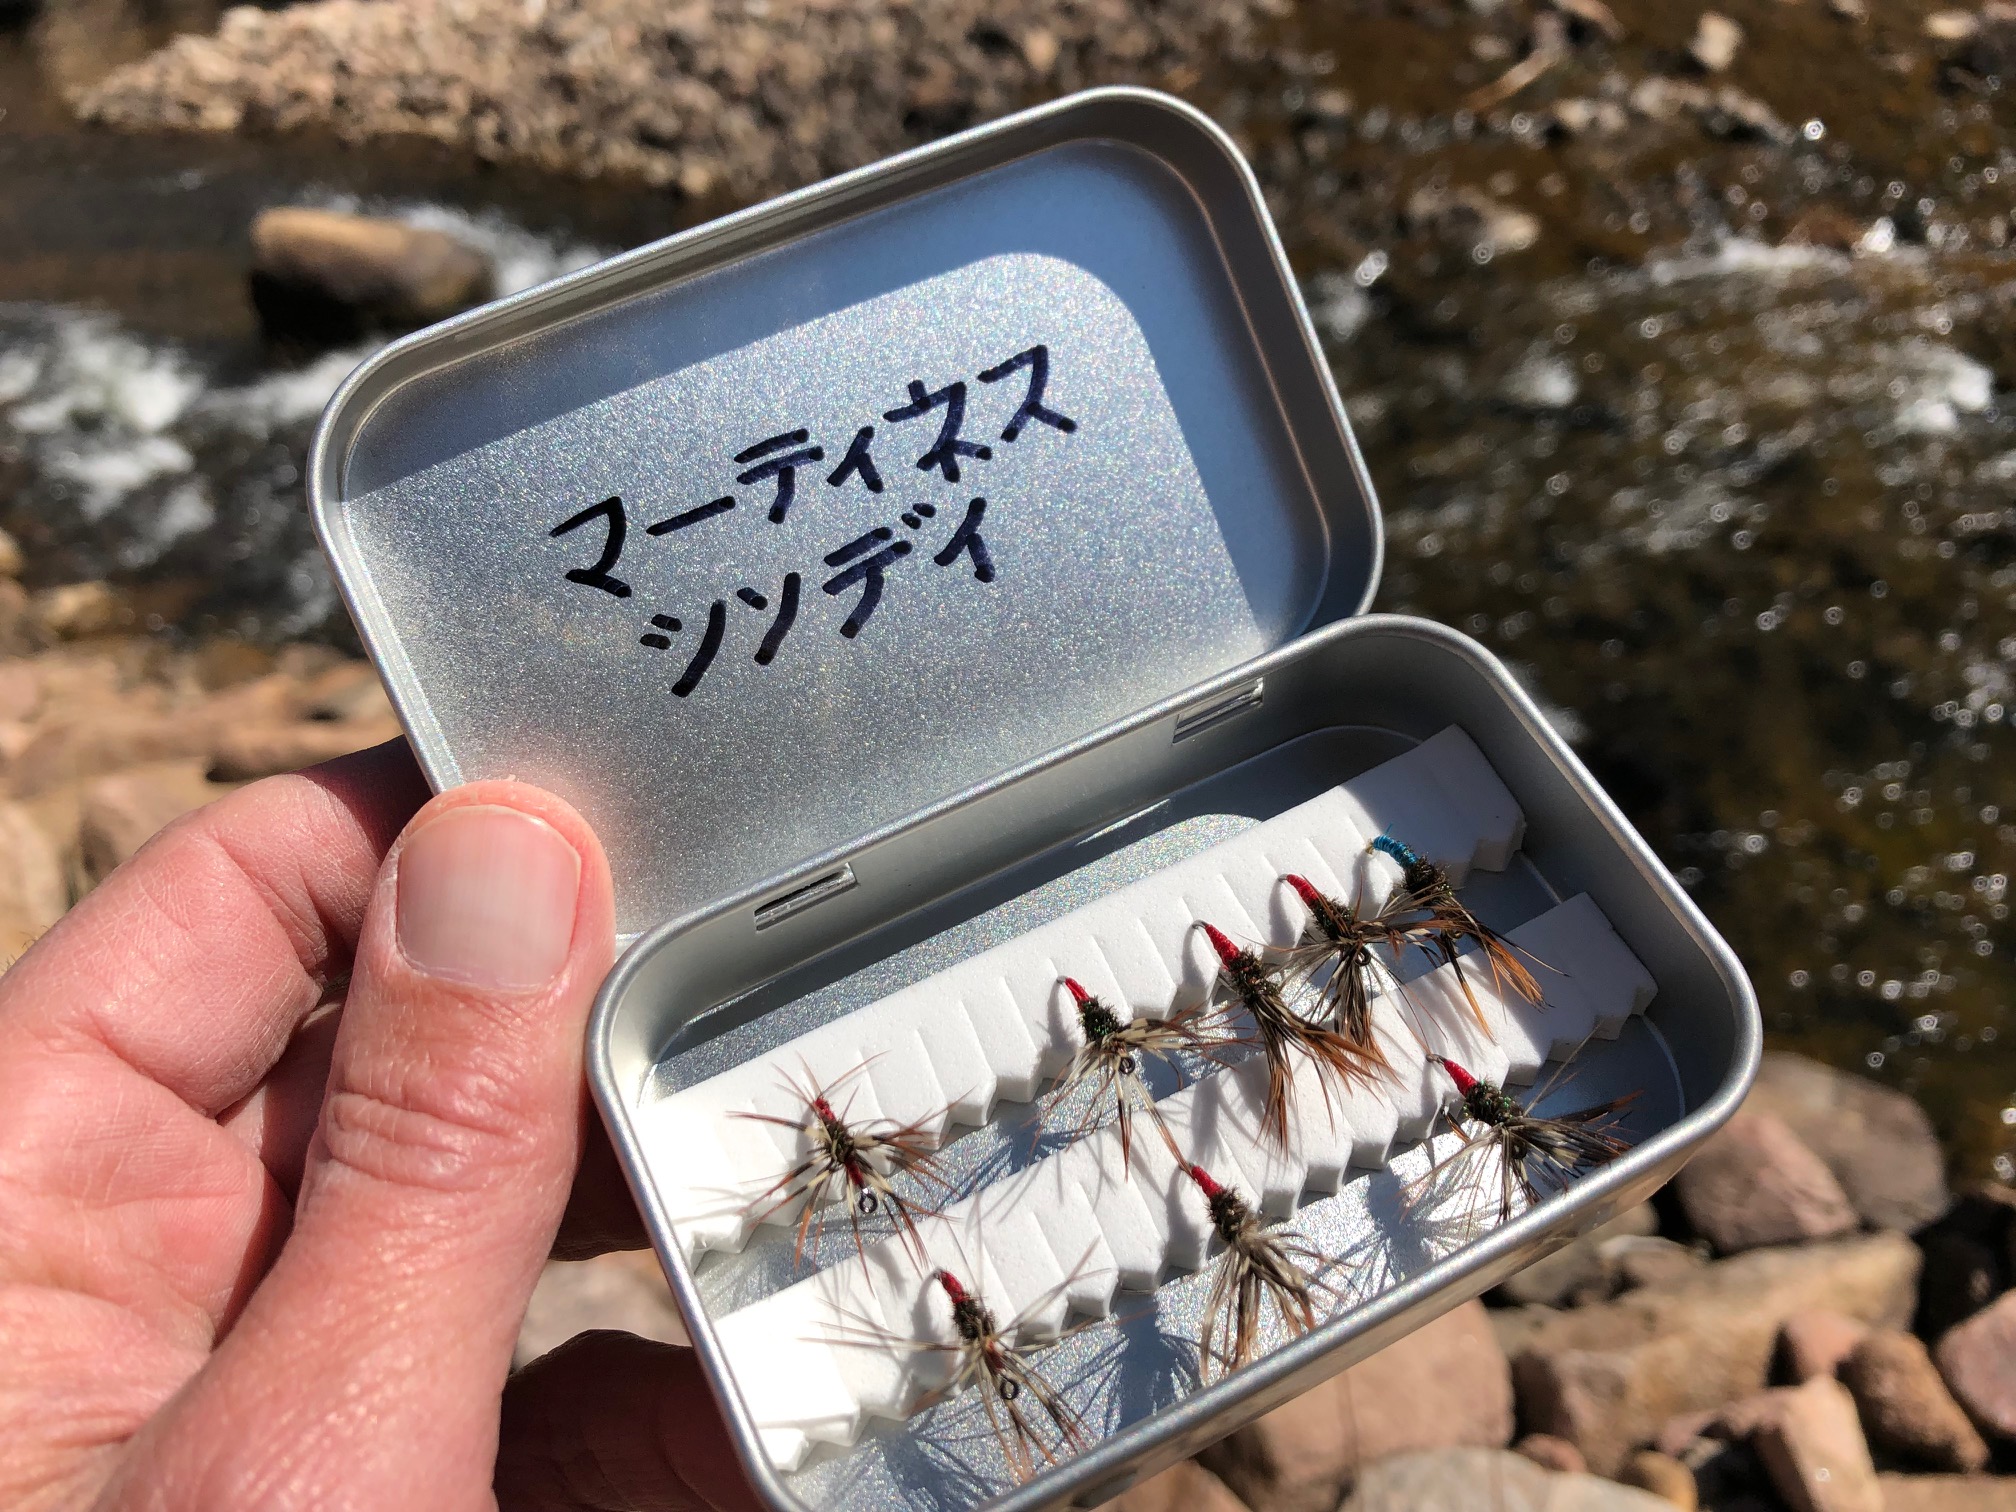
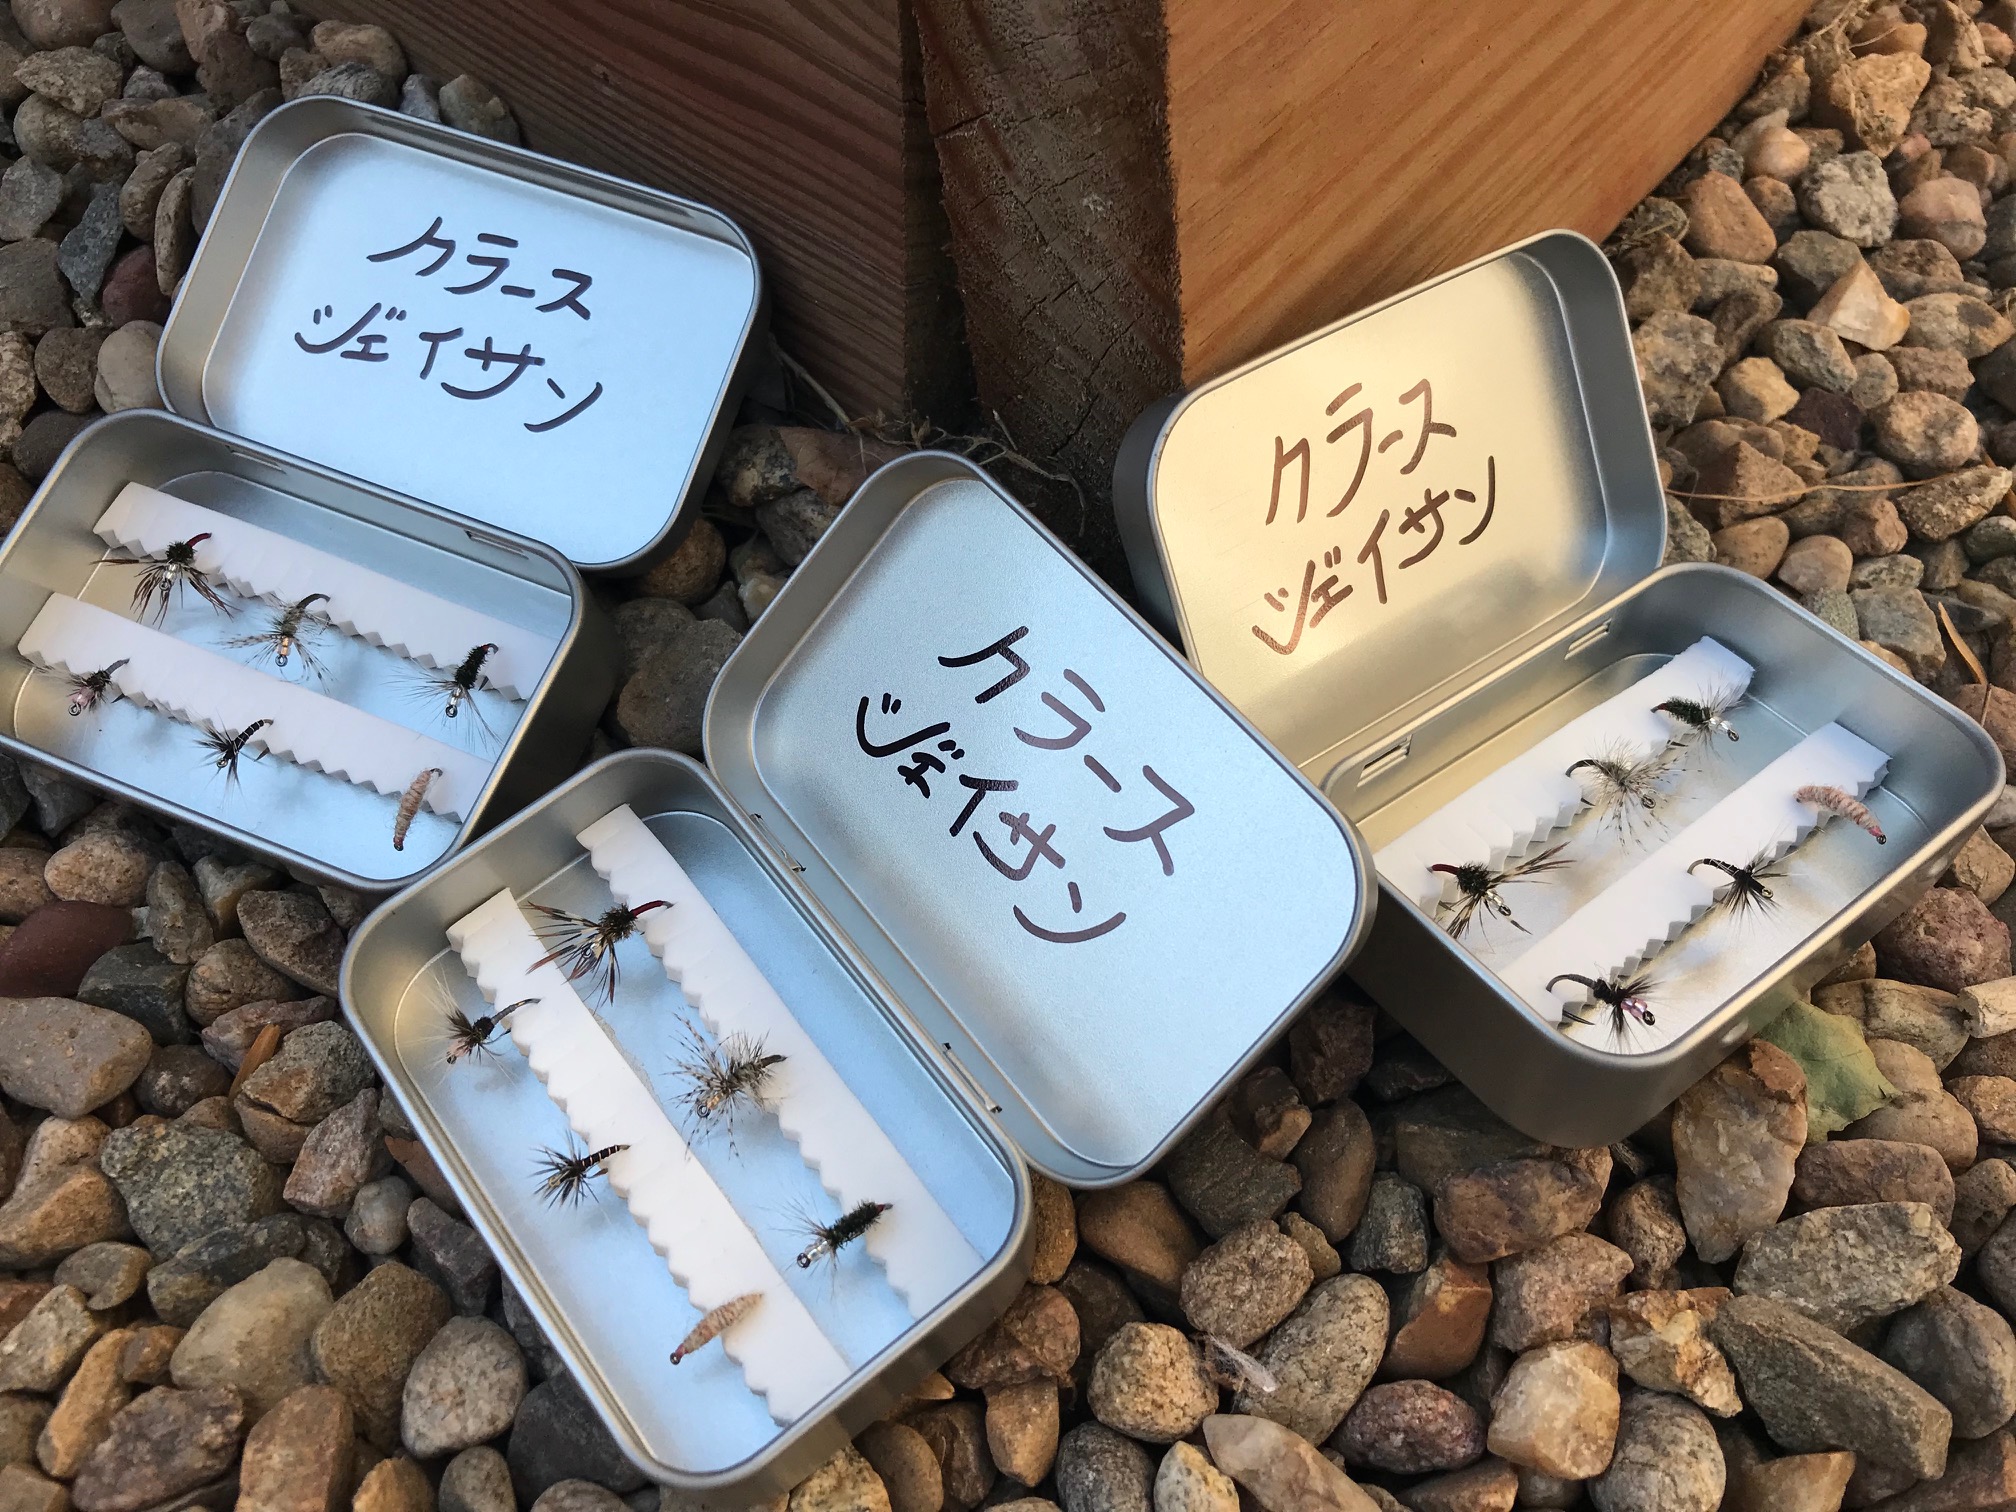
3. Aluminum tins with lids. These are basically the same as Altoids tins, just without the graphics. Of course, you could use an actual Altoids tin as will. I prefer the naked ones though (maybe because they remind me of classic Wheatleys).
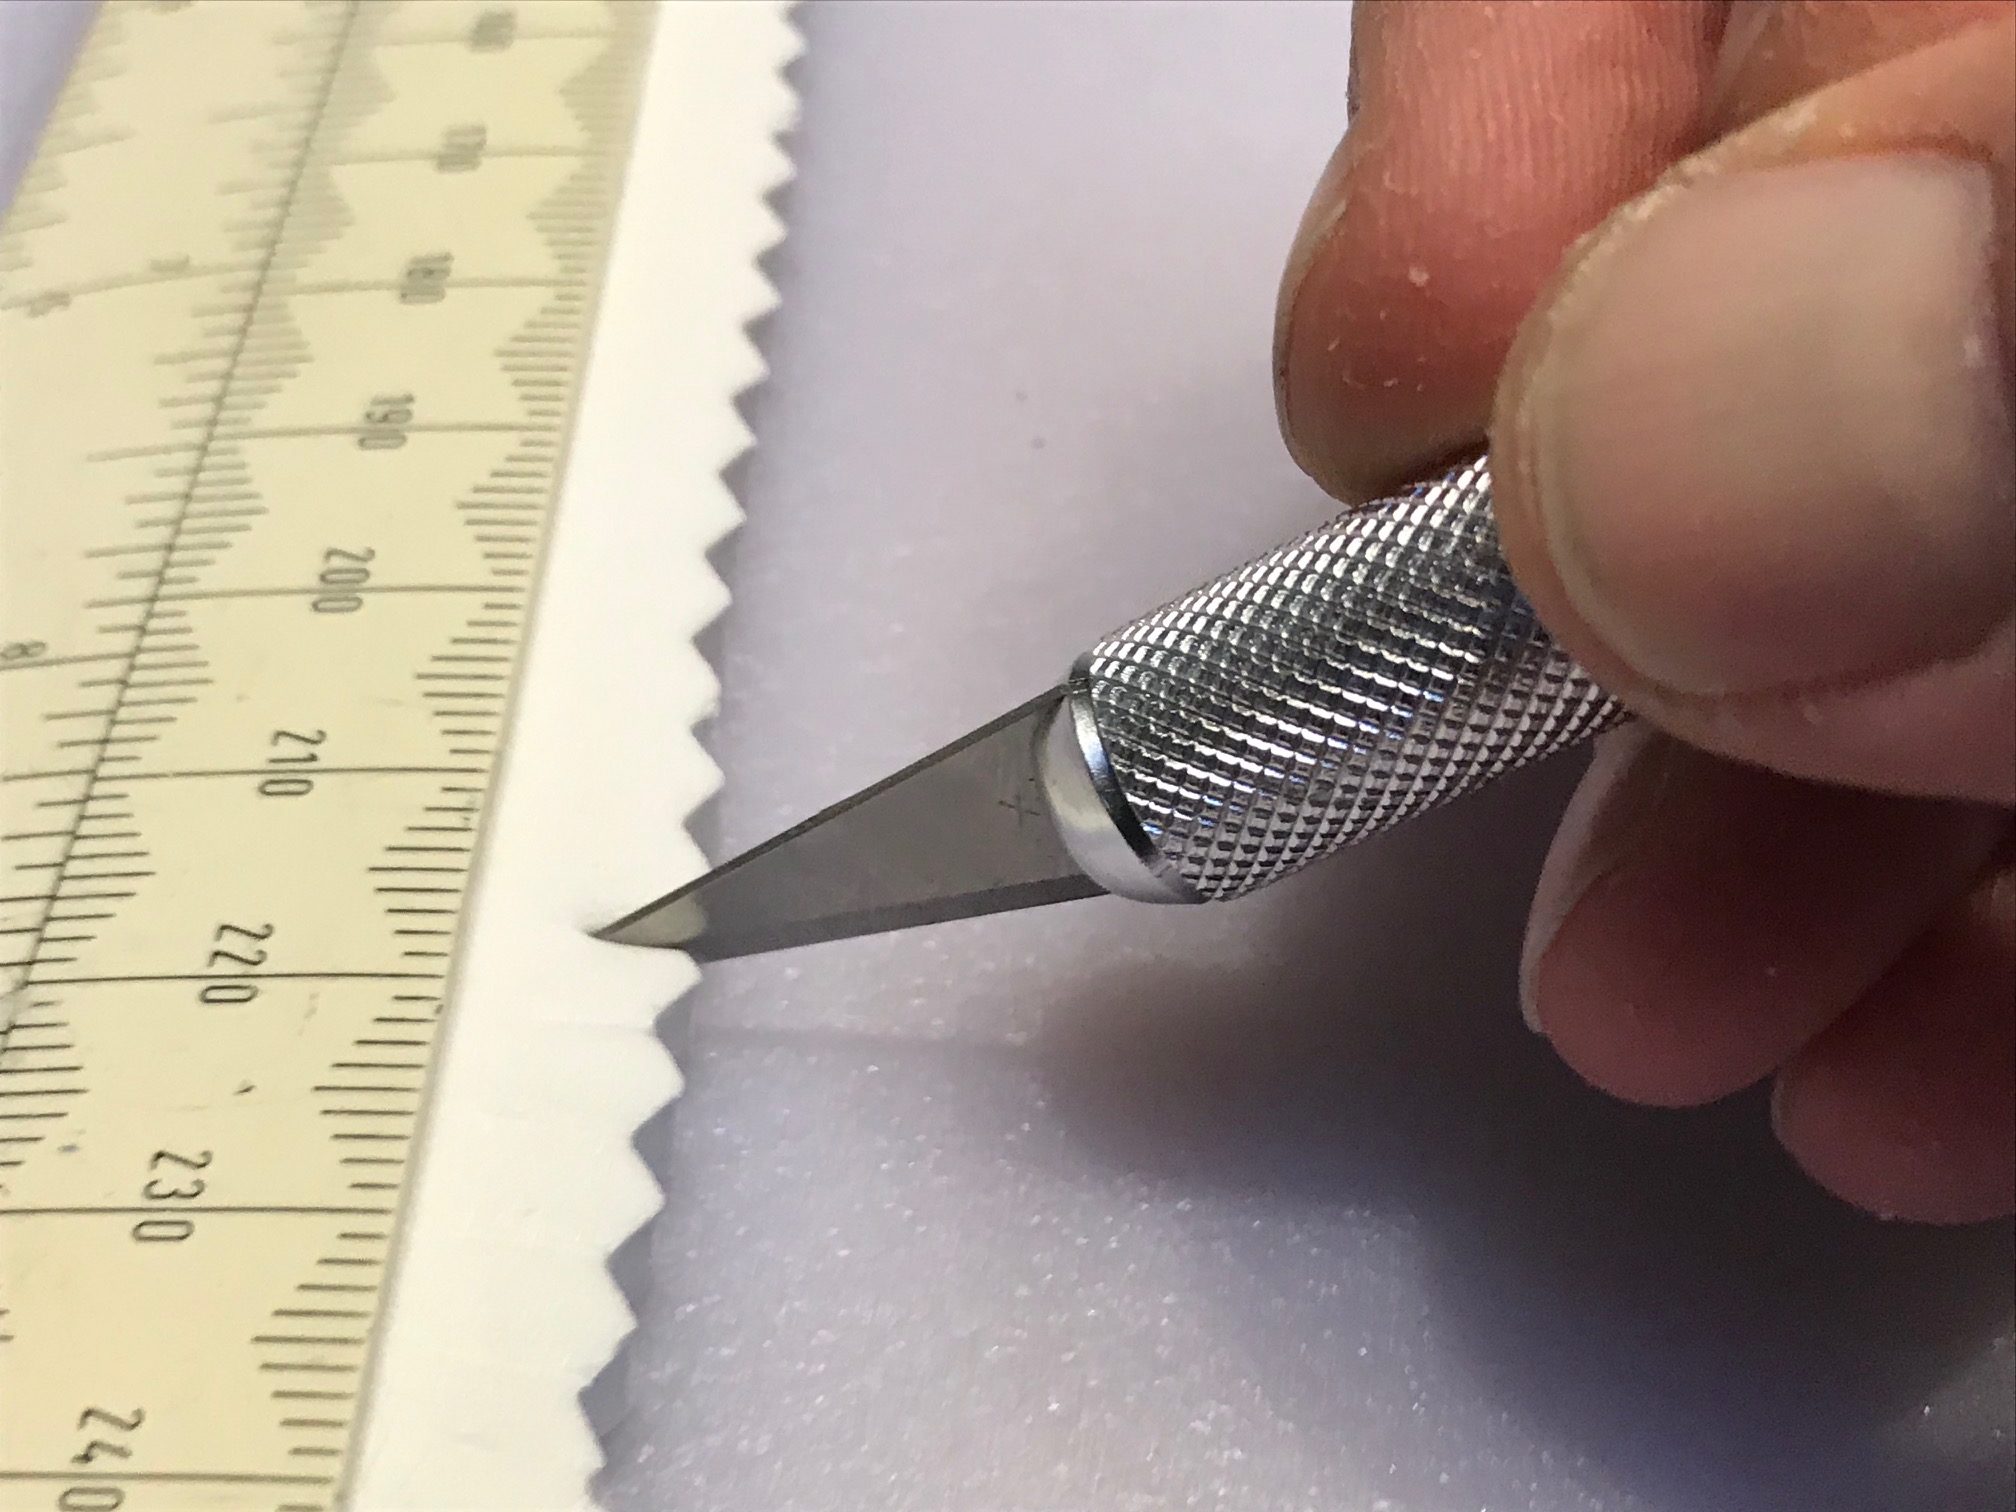
4. An Exacto knife. This is what you’ll use to cut the actual slots.
5. An adhesive. Almost any one will work but I like Loctite epoxy or 3M #77 spray (spray the #77 on something else and apply it to a Q-tip to apply–don’t spray it directly into the box).
The rest is easy!
First cut strips of the foam with the pinking shears that are equal to the width of the box. I find 2 rows per box is a good fit. I don’t measure the thickness but about 1/2″ seems to be a good size. Of course, you can make them any size you want.
Next, cut slits in between the valleys of the foam bars a little more than halfway through with your Exacto knife (or similar). Make sure you don’t cut all the way to the edge. I hold the foam down with a ruler so I get straight cuts and don’t slice too far.
Finally, glue the foam strips into the box. Tip: space them about 1/3 of the box size apart so your fingers have enough room to slide the flies out of the slots. Before I actually glue them in, I like to place them in the box to get a sense of where I’m going to ultimately place them.
You’re done!
Now for the fun part!
I typically keep mine pretty spartan and just write my name in Japanese inside the lid (or the name of a friend if it’s a gift) with a Sharpie marker. But there’s plenty of room for creativity. You could paint it, add stickers, engrave it, or use different colors of foam. I like to write my name or the name of the person I’m gifting it to in the lid.
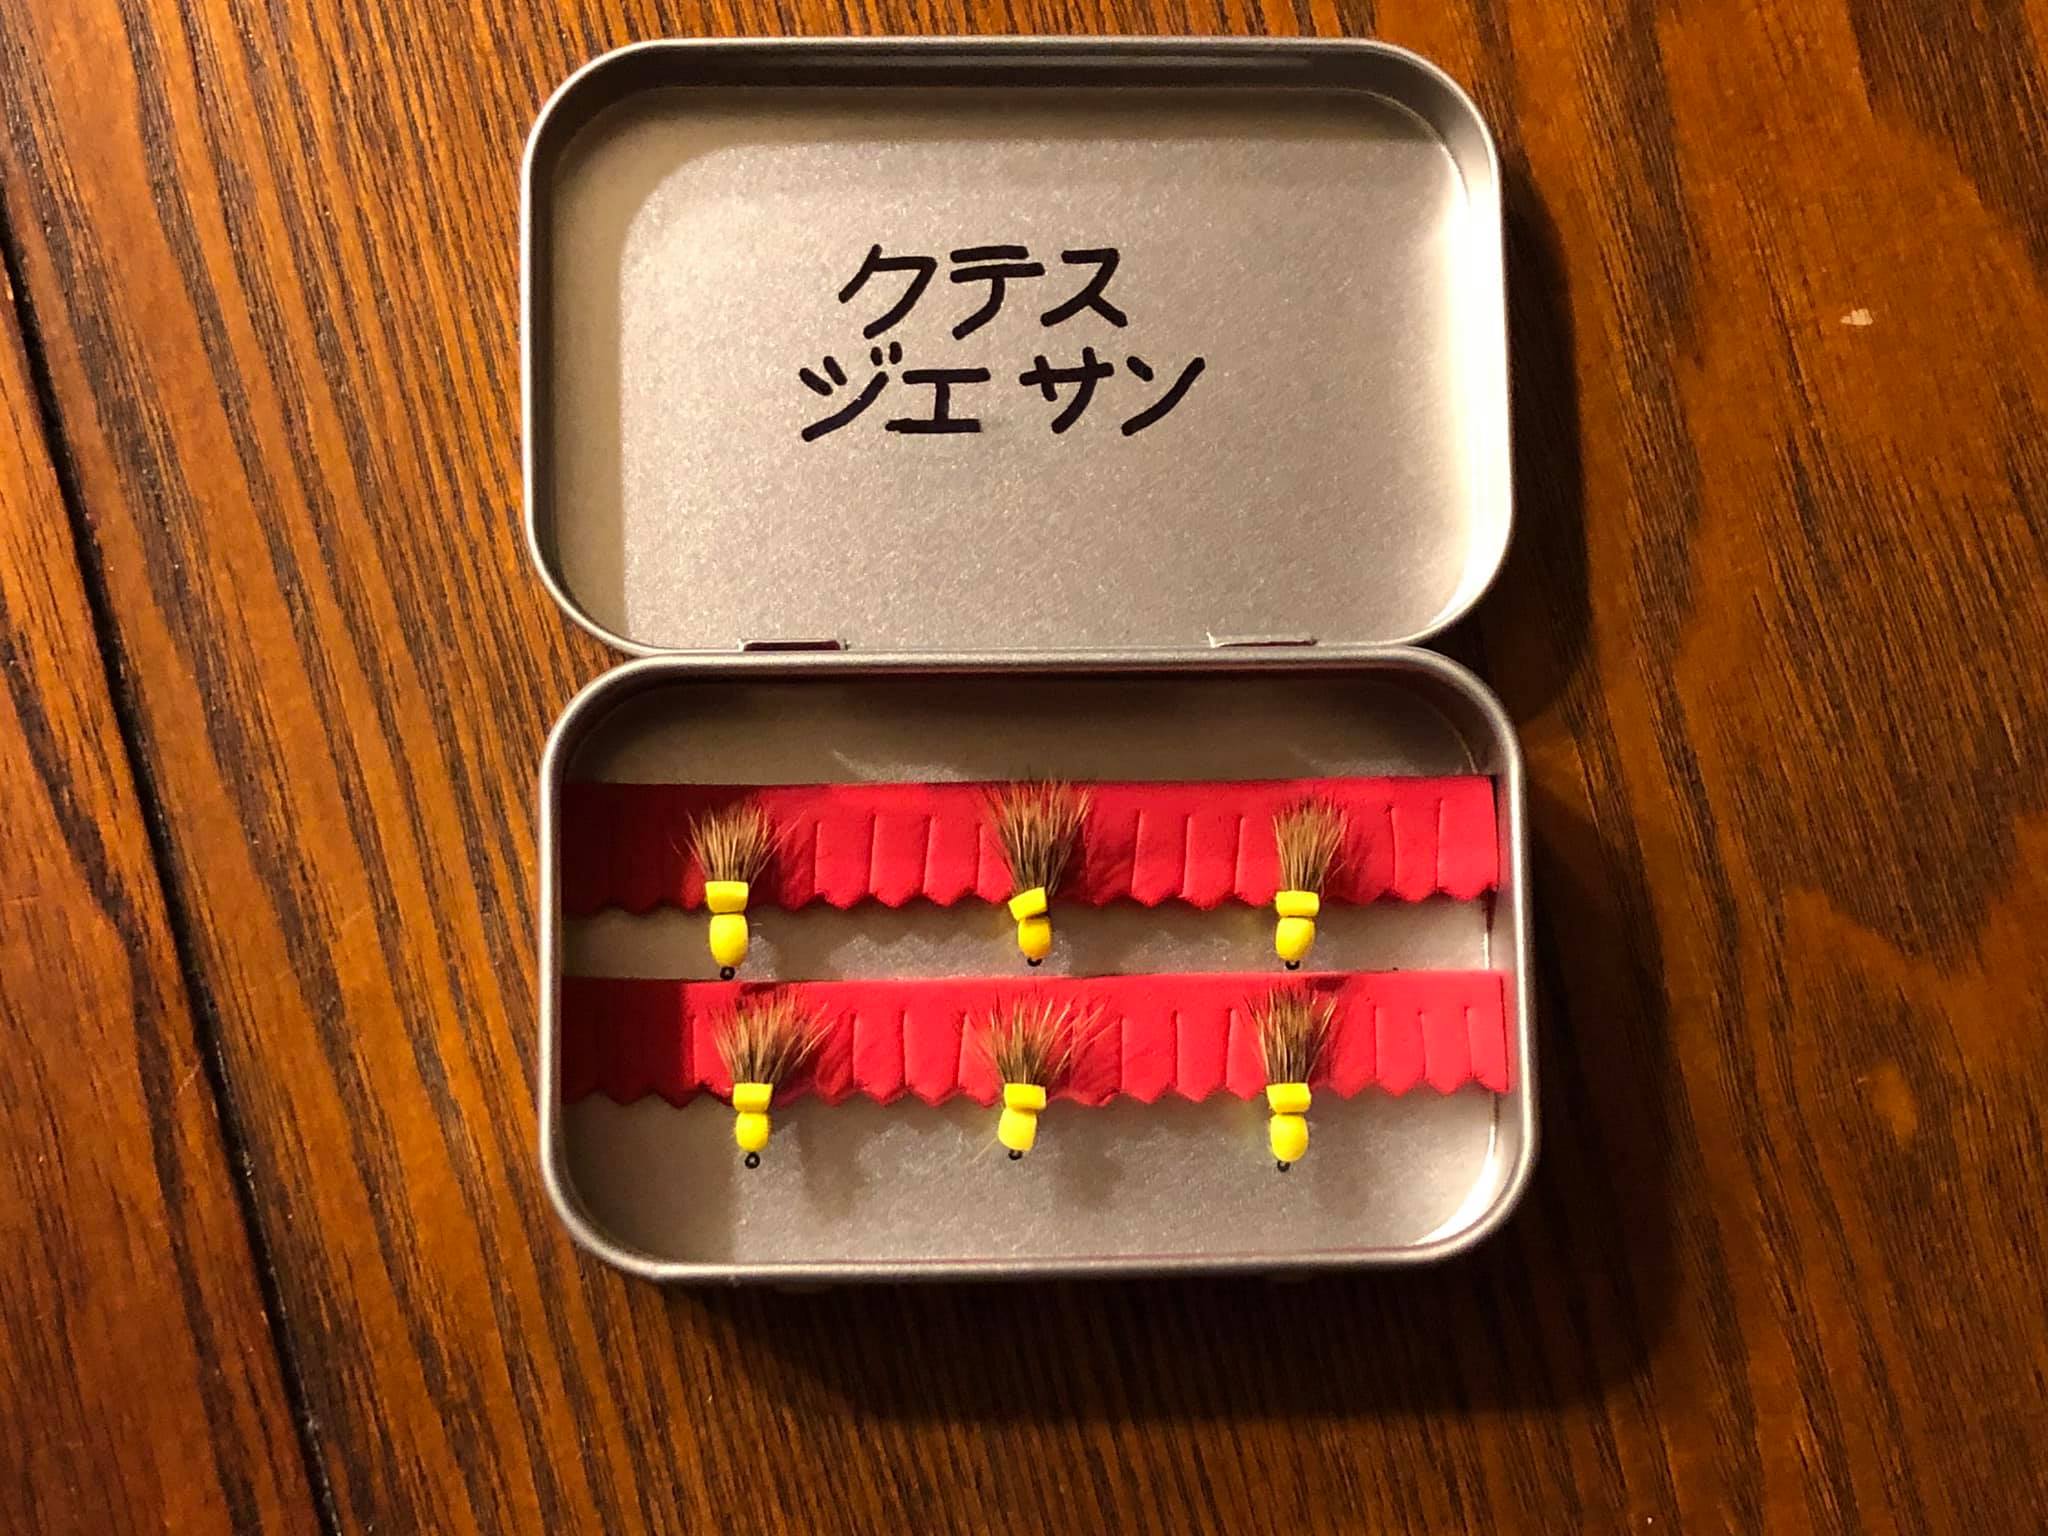
I’ve even made some variations with two different colors of foam in the same box–one color signified weighted flies and the other signified unweighted flies (see below). Anyway, just use your imagination!

These boxes are really fun to make, practical, and lightweight. One box will fit in your shirt pocket and will hold all the flies you need for a day on the trout stream. They make unique gifts and are perfect for stocking stuffers. Probably the biggest upfront investment is the pinking shears (about $20) but one sheet of foam will easily make dozens of boxes ($1) and the tin boxes are cheap so long term, these are very cost effective. And you’ll have the satisfaction of using gear you made yourself!
If you make some, please share pics in the comments below so others can see your ideas and get inspired. Happy pinkering!


Welcome back! Excited to see a post on my favourite Tenkara blog!
Thanks Jason! I’m slowly getting back to it. I’ve just had a plethora of personal and health issues that have prevented me from writing but I’m slowly trying to get back into it.
Great to see. Your input is valuable.
Great DIY and re-use idea. As and avid DIYer and re-user I’ve also used the packing foam that comes in some packaging rather than pitching it all in the garbage or needing to purchase foam.
Thanks Chase. I like to upcycle when I can. For the packing foam–some of the open-cell stuff wears out pretty quickly or doesn’t hold the hook well. That’s why I prefer the craft foam. But, you could still build a good DIY box with an empty Altoids tin and packing foam for free and at least give them seconds lives. I’ve tried cork as well but it just doesn’t have the hook-holding power of the slotted foam and wears out quickly.
VHS movie boxes make great streamer cases. Look for the ones that are solid plastic instead of the hollow shell. You have to first cut out the mounting pins for the tape with an Xacto knife then you’re good to start adding the foam. The boxes are large enough that I can even put foam on the inside of the lid to hold twice the number of flies.
Thanks for the tip! Any pics you could post here?